DIY: Floor Re-finishing

If your existing floor is beginning to look worn or tired, the first impulse may be to call the contractor and have floor replaced. Or sometimes the temptation is there to just have carpeting installed over top. The truth is, for a fraction of the money you would spend replacing the floor or covering it with carpet, you can rent the equipment you need to refinish your floor and have it looking brand-new again.

For waxed floors, renting a floor stripper/polisher can restore your floor to the original shine. Likewise, for carpeting, renting a professional carpet steamer will have your carpet looking and smelling like it was just installed.

However, the greatest potential for savings can be realized when you rent the equipment you need to refinish your hardwood floors. You will be able to rent everything from orbital sanders, drum sanders, to sanding belts and pads. Depending on the size of the area you wish to refinish and the level of refinishing that is required, this is a job that can be accomplished by most willing DIYers, and usually over just a weekend.

A picture containing indoor, person, table, desk
Description automatically generatedBelow are a few tips to make your floor sanding project a little easier:

  • Give your floor the “water test” to see how much work needs to be done. If water beads or soaks in slowly, then you might be able to get away with just a good cleaning and polishing. If the water soaks right in, then refinishing may be required.
  • If sanding is going to be done, then remove everything from the room. That includes wall hangings, curtains and blinds. Make sure everything is off of the floor in the entire area.
  • Completely sweep and vacuum the floor prior to sanding. Any pebbles, staples or nails lying around could cause gouges in the wood, once sanding begins.
  • Completely examine the flooring and countersink any nail heads to at least 1/8 inch below the surface.
  • You don’t want to remove any more of the wood floor’s surface than you have to. If your goal is to sand out minor blemishes and light scratches, then you may not need to start with a very coarse paper. An 80 grit paper may suffice as a starting point for a light sanding. If you need to remove a layer of paint, then you might need to start with 20 grit sandpaper. Old varnish should be removed by starting out with 36 grit sandpaper. Keep in mind that you will need to make at least two more passes, each with a finer paper, ending with at least a 120 grit paper.
  • When sanding with a drum sander, begin in the center of the room first. Be sure to sand with the grain of the wood and use a smooth, continuous motion as you travel from one side of the room to the other. Overlap each pass by at least 1 inch.
  • Use an orbital sander to sand the outer edges of the room.
  • Once finished, it is extremely important to vacuum all of the sawdust, followed by using a tack cloth to leave your floor completely clean. This step is crucial, because any debris left behind will become permanently sealed in once the polyurethane is applied to your floor.

An added advantage of renting what you need for floor finishing is the knowledge and advice an experienced rental company can provide. We understand your project and what you’re trying to accomplish. More importantly, we know exactly the right tools and materials that you need to get it done right. If you have any questions, such as types of sanders or which types of sandpaper is needed for your floor finishing project, you can count on us to steer you right


DIY: Floor Refinishing

Renting Floor Re-finishing Equipment for the DIYer

If your existing floor is beginning to look worn or tired, the first impulse may be to call the contractor and have floor replaced. Or sometimes the temptation is there to just have carpeting installed over top. The truth is, for a fraction of the money you would spend replacing the floor or covering it with carpet, you can rent the equipment you need to refinish your floor and have it looking brand-new again.

For waxed floors, renting a floor stripper/polisher can restore your floor to the original shine. Likewise, for carpeting, renting a professional carpet steamer will have your carpet looking and smelling like it was just installed.

However, the greatest potential for savings can be realized when you rent the equipment you need to refinish your hardwood floors. You will be able to rent everything from orbital sanders, drum sanders, to sanding belts and pads. Depending on the size of the area you wish to refinish and the level of refinishing that is required, this is a job that can be accomplished by most willing DIYers, and usually over just a weekend.

A picture containing indoor, person, table, desk
Description automatically generatedBelow are a few tips to make your floor sanding project a little easier:

  • Give your floor the “water test” to see how much work needs to be done. If water beads or soaks in slowly, then you might be able to get away with just a good cleaning and polishing. If the water soaks right in, then refinishing may be required.
  • If sanding is going to be done, then remove everything from the room. That includes wall hangings, curtains and blinds. Make sure everything is off of the floor in the entire area.
  • Completely sweep and vacuum the floor prior to sanding. Any pebbles, staples or nails lying around could cause gouges in the wood, once sanding begins.
  • Completely examine the flooring and countersink any nail heads to at least 1/8 inch below the surface.
  • You don’t want to remove any more of the wood floor’s surface than you have to. If your goal is to sand out minor blemishes and light scratches, then you may not need to start with a very coarse paper. An 80 grit paper may suffice as a starting point for a light sanding. If you need to remove a layer of paint, then you might need to start with 20 grit sandpaper. Old varnish should be removed by starting out with 36 grit sandpaper. Keep in mind that you will need to make at least two more passes, each with a finer paper, ending with at least a 120 grit paper.
  • When sanding with a drum sander, begin in the center of the room first. Be sure to sand with the grain of the wood and use a smooth, continuous motion as you travel from one side of the room to the other. Overlap each pass by at least 1 inch.
  • Use an orbital sander to sand the outer edges of the room.
  • Once finished, it is extremely important to vacuum all of the sawdust, followed by using a tack cloth to leave your floor completely clean. This step is crucial, because any debris left behind will become permanently sealed in once the polyurethane is applied to your floor.

An added advantage of renting what you need for floor finishing is the knowledge and advice an experienced rental company can provide. We understand your project and what you’re trying to accomplish. More importantly, we know exactly the right tools and materials that you need to get it done right. If you have any questions, such as types of sanders or which types of sandpaper is needed for your floor finishing project, you can count on us to steer you right

Spring Maintenance: What Equipment to Rent for After the Snow Melts

A blanket of snow may be pretty to look at, but what is it covering up? The harsh winter weather takes a toll on the exterior of homes and yards, while much of the damage and debris is hidden until spring. Once the snow melts and the moderate temperatures are upon us again, it is a good time to take a walk around the property. Grab your jacket and a clipboard, if you’d like, before heading out for your stroll. Below, we’ll discuss what to look for on your spring maintenance walkabout.

Start at the top
Your roof is the most abused part of your house during the winter. Don’t worry about climbing, though. Check for obvious things like leaks from the attic. Otherwise, take that pair of binoculars and see if anything looks amiss. Search for cracked, crooked or missing shingles. Nail pops usually are indicated by a shingle tab being pushed up by the head of the nail below. The shingle tab will give a slightly raised “eyebrow” appearance from below. Water is likely to seep around the raised nail. If anything looks damaged, it should be addressed. Fixes on your roof require products that you may not use year round. Renting these items can save you both time and money in the long run.

Other things that should be checked are the gutters and chimney(s) which may have suffered damages during the long winter months.


All four sides

Is there any damage to your siding? Look all around the outside of your home, especially under the
eaves and near gutter downspouts. Look for signs of water staining which will indicate a leak from above. For wood siding, check for popped nails and knot-holes. These and any other openings will provide easy access for bugs and other pests to move in.

If the outside of your home is looking neglected, rent a pressure washer to make this spring project a bit quicker. Just be sure to stop in and chat with us before taking on this project so we can make suggestions on just the right amount of pressure that you’ll need. A pressure washer can also come in handy because it can handy with your driveway and wooden deck.

Your outdoor spaces
The freezing and thawing of water, as well as salt can be hard on driveways and sidewalks. Take a look and address any holes or cracks that have occurred. If your concrete looks to be in good shape, it still may be a good idea to apply a fresh coat of sealant to keep moisture at bay.

Any exposed wood outdoor structures like decks, privacy fencing and latticework should be inspected for damage. Look for warping, popped nails and loose boards. Does your deck only need a washing or is it time for stain/sealer?

Take a look at your shrubbery and trees. Remove any broken or fallen branches and allow for the new growth. It’s also good to note that during the early spring, while little has grown back yet, it’s the best time to plan any changes you like to make with your landscaping. Sketch things out now, so that when the warmer weather hits and the ground thaws, you are ready to start digging.

Although it’s easy to seem like you may have a lot of work to do before the spring sets in, don’t worry, we are here as a resource to you. Feel free to give us a call or visit our website to shoot us an email with any questions you may have.

Doing Your Own Catering? We Have the Supplies to Help!

There are many reasons why you may choose to do your own catering for a special event, from budgetary concerns to dietary needs to a preference for favorite homemade dishes. No matter what may be on the menu, however, renting the proper supplies can be a tremendous help to create a delicious and memorable meal.

Why Rent Instead of Buy?

If you are doing your own catering, you may already have a good collection of serving dishes, buffet pieces, table linens, dishes, and cutlery, so why should you consider renting instead of using your own supplies? There are many benefits to renting supplies, and doing so can give your event a coordinated, elegant look while still showcasing your homemade foods and treats.

  • Coordination – If you rent supplies, you can choose patterns, shapes, and styles that will all coordinate well instead of relying on a potentially mismatched collection you have gathered over the years for different events.
  • More Design Options – Rental companies offer a variety of designs and styles available for rent, including different colors and patterns. This allows you to choose exactly the theme or motif that will match your event the best.
  • Ample Supply – There is no worry about running out of dishes, not having enough trays, or missing a few pieces of silverware if you rent supplies. By renting, you can be sure you have enough equipment for your event, no matter how many people you will be serving.
  • Less Expensive – If your personal supplies aren’t quite adequate for your event, you may end up spending a great deal of money to purchase extra pieces to use one time. By renting, those costs are much lower and you don’t have to bustle around to find extra equipment.
  • No Need for Storage – By renting supplies, you have no need to store them in cabinets, cupboards, tubs, or bins gathering dust or taking up valuable space in your home. Instead, they’re returned to the rental company and out of your way completely.
  • No Risk of Breakage – While any dishes can break even when treated carefully, if you’re using rental supplies, you aren’t risking damage to a family heirloom, precious gift, or irreplaceable dish or server.
  • Specialty Supplies – Rental companies offer much more than just basic equipment, and it is easy to rent those unique and unexpected pieces that can make your event more fun and memorable.

Supplies You Didn’t Know You Needed to Rent

While it’s easy to calculate the number of plates, glasses, and cutlery settings you may need for an event, there is even more to rent if you plan to do your own catering. Consider these specialty supplies that can give your event a polished, professional look and make the catering much easier.

  • Chafing Dishes: Different sizes and styles of lidded serving dishes with heat sources.
  • Urns: Large capacity dispensers for hot or cold beverages.
  • Platters and Trays: Flat or divided options for serving drinks, appetizers, or desserts.
  • Condiment Dishes: Salt and pepper shakers, spice shakers, butter holders, cruets, gravy boats.
  • Pitchers: Plain or insulated pitchers for tables, great for tea, coffee, milk, juice, water, etc.
  • Serving Utensils: Ladles, spoons, turners, tongs, spreaders, scoops, carving sets, etc.
  • Baskets: Perfect for serving bread or fruit on individual tables, or holding condiments.
  • Carts and Caddies: Tray stands, shelf carts, linen carts, etc. to make serving and clean up easier.
  • Fun Focal Points: Unique rentals to make your event stand out, such as chocolate fountains, popcorn machines, or cotton candy machines.

No matter what your self-catering plans may include, be sure to plan the proper rentals to make your meal easier and more coordinated from the initial preparation to the serving to the cleanup. The right supplies can turn even simple, delicious home cooking into a memorable feast all your guests will enjoy.

Spring Lawn Care Tips

Warmer days means more time outdoors. It also means everything outdoors begins to grow and thrive after being dormant all winter. As a homeowner, one of the most important aspects of your home is the lawn that surrounds it. Growing up, a flourishing lawn was a symbol of pride and prosperity that one could echo throughout the neighborhood. A good lawn is a place where your kids can play outside, you can host family BBQs, and relax under the stars on a nice summer night. Like coffee in the morning, it’s something every homeowner has to have more than anything else. To achieve a green, lush lawn this year follow these spring lawn care tips to set yourself up for success in the months to come.For starters, winter is not friendly to the soil of your lawn. Neither is the salt or ice melt you might have used throughout the colder season. All of these factors can alter the pH of your soil, compact the soil, and create the type of conditions that make your lawn more susceptible to weeds. Take on the side effects of winter and attack them head on by thoroughly raking your lawn or using a thatching power rake from Taylor Rental to dethatch all of the dead grass and leaves that have built up. Power Raking will create the canvas that will allow for new blades of grass to grow and will also help nutrients penetrate your soil.

Following dethatching the grass, grab an power aerator and use it across your entire lawn. Aerating helps break up any compaction by making little holes in the lawn so that oxygen gets to the roots of the soil allowing it to breathe. If you notice that bare spots have formed in your lawn, utilize a soil conditioner and overseed the areas that need attention.

Once you’ve established the proper canvas for grass to grow and thrive, encourage the growth of your lawn by applying the right combination of fertilizers and herbicides. These will help control the impact of weeds and insects while supplying your lawn with the nutrients it needs. Be cautious of which fertilizer you use and when you use it as in some cases fertilizer can do more harm than good. Proper fertilization typically happens on a schedule meaning if you fertilized your lawn in the late fall, you most likely don’t need to early spring. If this is you, then it might be more suitable to focus on weed control than supplementing your lawn with additional nutrients. If your lawn has not been fertilized in some time, I recommend spreading a slow-release nitrogen fertilizer early in the season every 1,000 square feet to maximize yield. One important tip is to not use herbicide if you’re trying to grow new grass from seeds as the herbicide can prevent the seeds from germinating. In most cases, herbicide can be used for spot treatments to resolve isolated problems in your lawn.

Feel free to use the mulch function on your lawn mower to give your lawn a boost of organic nutrients as well. Lastly, don’t forget to tune up any yard equipment, check irrigation systems if you have them, and replace any tools or equipment that may be unusable.

Allow the hums of the mowers and edgers around the neighborhood to move you in the direction of a green lawn. Everyone’s lawn is different and comes with its own unique set of circumstances. Evaluate the status of your grass and follow these spring lawn care tips as needed to achieve a healthy lawn all season.

Choosing the Perfect Color Scheme for Your Party Linen Rentals

Color sets the mood for any event, and choosing the perfect color scheme for your party linen rentals can help you design an elegant, festive occasion. It takes more than just picking a favorite color, however, to create a coordinated color scheme that will enhance your event without being distracting or dominating.

Consider the Mood

When choosing colors and planning a color scheme, you must consider the mood of your event. Colors ought to reflect that mood, as well as the function of the occasion, and different shades are better for different types of events. A solemn memorial wake, a professional business luncheon and an exciting baby gender reveal may all use blue as a base for the color scheme, but the hues will be very different. Darker, more muted tones are best for solemn, somber or reflective events, while bolder shades have more energy and confidence for a productive atmosphere. Brighter, snappier colors are energetic, celebratory and happy, while pastel hues evoke a sense of nostalgia, wistfulness and gentleness.

Temperature is another aspect of color to consider when setting a mood. Cooler shades such as blues and greens are more restful and relaxing, while warmer tones like reds, yellows and oranges are somewhat more vibrant and empowering.

In addition to a color mood and temperature, don’t forget neutral shades that can help coordinate multiple hues without overwhelming the color scheme. Whites, ivories, grays and beiges are ideal as neutral options and can blend well with any other color choice

Coordinate With the Setting

When choosing colors and designing a color scheme, consider the setting where the colors will be used. Coordinating your colors with the natural background, whether it is a garden, park or other outdoor landscape or a ballroom, reception hall or indoor venue, will help you design a sophisticated, eye-catching event. Many venues that host a wide range of events will be decorated in neutral tones in order to accommodate many color options, but more specialized locations may require more deft color coordination to blend seamlessly with your party linen rentals. Consider the colors of any flooring or groundcover, flowers, paint or trim, light fixtures, wall coverings and other decorations, as well as furniture, and choose your colors accordingly.

Add a Pop of Contrast

Once you have selected a base color for your overall scheme, add a pop of contrast to draw out the rich hues and catch the attention of your guests. Boldly contrasting colors on opposite ends of the color wheel are a popular option, or you might choose much darker or lighter shades in the same color family. Metallic and neon hues are also great choices, but should be used sparingly to avoid an overwhelming or garish result. If you have opted for neutral base colors, bolder shades will work well as accents, but avoid choosing more than one or two accent colors or you risk a color scheme that will look too haphazard for an elegant or coordinated appearance.

The Right Color With the Right Linen

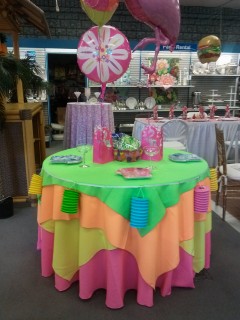
No matter what colors you choose, it is important to pair the right color with the right linen for a well-coordinated party. Larger, background linens such as tablecloths, wide runners, draperies and chair covers are best in more neutral, subtle shades and will form the base of your color scheme. Use your accent colors for smaller, more flexible linens such as napkins, thin runners, chair bows, overlays or ribbon accents. If you are using more than one accent color, consider alternating how the different accents are used to keep the overall palette balanced and ensure no one area is overwhelmed with a single shade.

Color can be the key to a memorable, elegant event, no matter what type of party you are planning. By choosing the perfect color scheme for your linen party rentals, you set a bright and beautiful tone for your celebration and create a picture perfect setting for your guests.

Glassware Rentals For Weddings

If you attended or planned a wedding this year, then you know that glassware is a crucial part of the entire event. Types, sizes, and quantity are just a few attributes that have to be accounted for when using the right glassware for a wedding. It may seem like just a piece of glass you drink from, but wedding glassware can leave a mark on the overall impression of the event. Take for example the movie Sweet Home Alabama starring Reese Witherspoon. There’s a scene where she’s visibly impressed by the stemware created by her ex-husband and wanted to use it in her own wedding. You see similar scenes in other movies where someone smirks or comments at the status of a drinking glass. Simply put, glassware is a big deal. After all how else are you going to tackle that champagne glass waterfall? The easiest way to tackle this challenge is by renting all the glassware. Not only is this option more affordable, it offers a wide variety of options and styles to choose from to make the wedding a hit.

Start by contacting your rental dealer as early as possible to get the best price and the most options. Don’t forget to do your homework and take notes from wedding magazines, pinterest, friends who have been married, family, and your experience at recent weddings. Each guest requires at least three sets of glassware and even more if you’re having multiple receptions at your wedding. Your caterer may also request additional glassware to be rented for food and drinks to be served.  What types of glassware should you rent for your wedding? Start with renting wine glasses, flutes for the champagne toast, water goblets, old fashion glasses for sodas and mixed drinks, pint glasses for beer, and additional wine and old fashioned glasses for the bar(s).  These are all considered standard glassware items used at most weddings. Depending on the theme and style of your wedding, you may require additional stemware such as martini glasses, snifters, or even mason jars if you’re opting for more of a farmhouse themed wedding. The great thing about renting the glassware is that makes all of these options readily available to you. You won’t have to spend excess amounts of money and you can customize your options as needed. Work with your wedding planner, caterer, and rental company to achieve the best options available at the best price.

Rent your glassware to help you stay under budget for your wedding while also giving your guest something real to drink out of versus plastic. While there are some venues that prohibit glassware, use it where applicable to give your wedding a classic and authentic feel. Make the right choices for glassware at your wedding, and I promise the bride’s dress won’t be the only topic of discussion at the dinner table!

Do’s and Don’ts With Rental Equipment

Renting equipment can be pretty easy if done right. Even if you’re on the other side of the counter and you are the one doing the renting, it really all comes down to planning ahead, paying attention to detail, and knowing where you stand. Here are a few do’s and don’ts with rental equipment to get you headed in the right direction.

Continue reading

What Equipment to Rent for After the Snow Melts

A blanket of snow may be pretty to look at, but what is it covering up? The harsh winter weather takes a toll on the exterior of homes and yards, while much of the damage and debris is hidden until spring. Once the snow melts and the moderate temperatures are upon us again, it is a good time to take a walk around the property. Grab your jacket and a clipboard, if you’d like, before heading out for your stroll. Below, we’ll discuss what to look for on your spring maintenance walkabout.

Continue reading

Your Guide to Catering a Large Backyard Party

It’s official – Spring is here, and the beat of the sun is only getting stronger. There’s nothing better than being out in the yard enjoying the sun while having fun with friends and family. As it gets warmer, it’s time to start thinking about hosting the perfect backyard party.Parties can be either simple or difficult to throw depending on how much preparation and planning you put into it. What stumbles most people is their budget and the belief that they have to own everything they need to cater a large backyard party. The answer to this problem is utilizing a party rental company to help provide everything you need. In this article, you will find a simple guide to accommodating a large backyard party.It simply doesn’t make sense for you to own enough chairs, tables, and other tools to host a large party. Unless you host a number of parties each year, owning your own party equipment is expensive and difficult to accommodate.  Look to your local rental store to help you out.The first step to catering a large party outdoors is renting a tent. Tents come in all shapes and sizes and are often the first items to go during this season. Everyone is looking for a big tent this time of year for graduations, weddings, and reunions. Don’t delay in contacting your rental dealer for a tent that’s big enough for your guests to relax out of the sun. There are tents set up by the rental company, or – if you have the help and know-how, you can rent a Do-It-Yourself Canopy that seats as many as 50 guests or more!The second step is to rent tables and chairs. An event is not fully catered unless it comes equipped with table and chairs for guest to sit, eat, and enjoy their time. One of the great positives of working with a rental dealer is the number of options and styles that are available to choose from. Rentals offer you the flexibility to try something new and give your guests a quality experience that matches any occasion. Feel free to mix and match to find an arrangement that best meets your budget and plan for the party.

The next step in the guide is to rent all the catering tools to prepare, setup, and provide food and beverages. Items such as chafers, large propane grills, bars, and extra coolers can all be rented to help provide your guests with hot food and cold drinks at your party.

Lastly, rent entertainment for both adults and children. Moonwalks or bounce houses and games like corn hole or horseshoe are great ways to keep everyone engaged and active throughout the party. You can even take it one step further by nabbing a karaoke machine to really increase the fun.  If you have pool in your backyard, kick things up a notch by renting a slip and slide for everyone to slide into summer with a smile.

Take advantage of the tips described above to successfully cater a large backyard party. Make it easy on yourself, reduce the stress and rent everything you need. Follow this guide and start entertaining guests without any hassle and instead, all the fun.